Blissful Static Site Development with Jekyll, BrowserSync, and tmux
I was recently listening to the Shop Talk Show podcast where Chris Coyier shared a submission from a listener that outlined the development and deployment setup for her personal website. It involved using Dropbox to sync blog posts to a static site generator on her server and sounded pretty slick. I thought I would add to the conversation by sharing my setup for developing this site. These are the technologies that are used in concert:
- GitHub Pages
- Jekyll
- BrowserSync
- tmux
- iTerm2
Overview
Here is a visual overview of the development setup, created with Lucidchart.
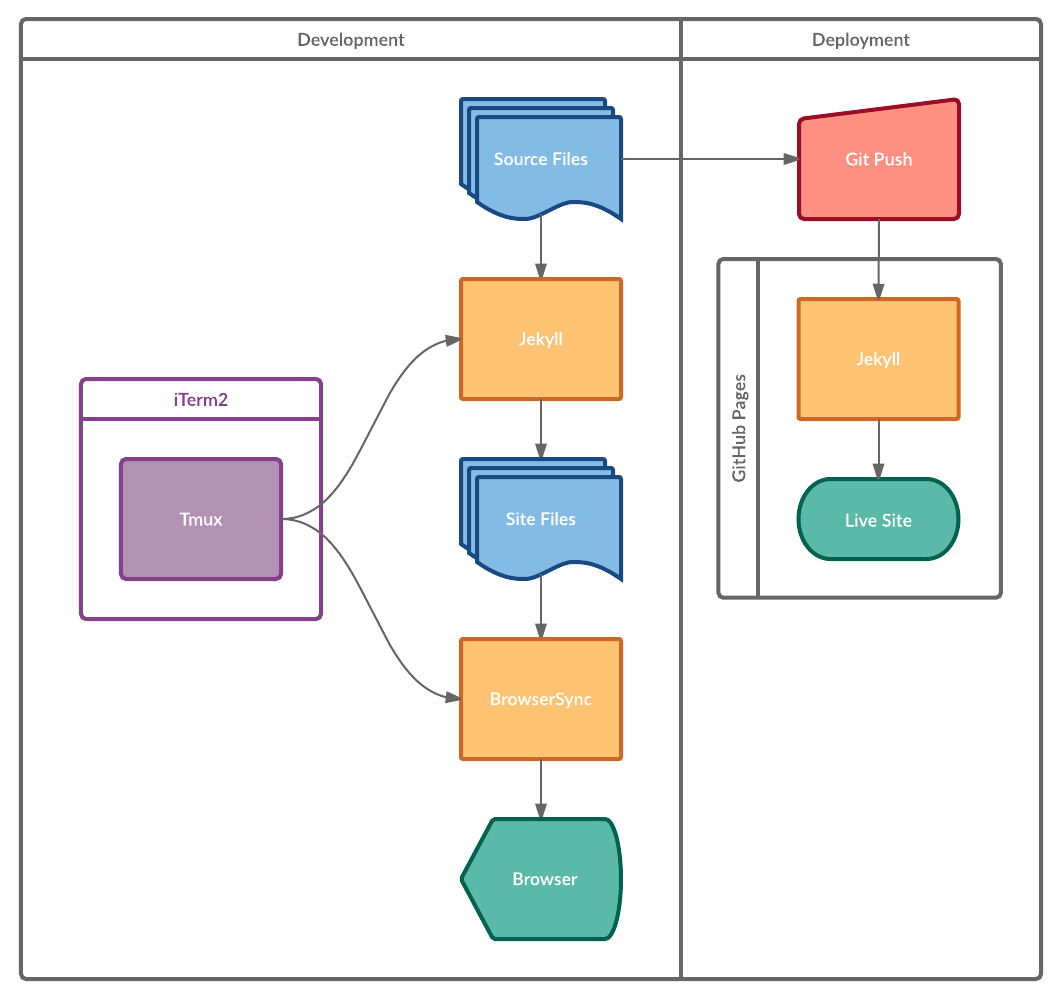
Further explanation of each component is below.
GitHub Pages
GitHub Pages is just about the easiest way to deploy a basic website these days. If you have a GitHub account (free), the process is simple:
- Create a repository with a special name:
<your username>.github.io(for example, mine ismjswensen.github.iofor this website). - Add your website files (
index.html, etc.) to the repository. - Commit and push. Within a few minutes (usually just seconds), your site will be live at
http://<your username>.github.io/.
If you want a custom domain instead of the default, it’s easy to set that up, too.
The best part? It’s fast. GitHub distributes the content on GitHub Pages via CDN out of the box, so visitors to your website download your content quickly no matter where they are. One of my recent posts happened to be trending on Hacker News one morning and that page had about 7,500 views over the course of a few hours; the site was still responsive as ever during that time, despite the drastically increased load.
And it’s free. You really can’t beat that.
Jekyll
Jekyll is a static site generator, which—as the name suggests—makes creating static HTML sites a breeze. Jekyll is one of the most popular static site generators. This is due in part to the fact that it integrates with GitHub Pages. If you build your site with Jekyll, GitHub will detect that your site is a Jekyll site and will compile it for you when you push (as outlined above). So for development, one can install Jekyll and build the site locally, push and have GitHub build the live site, and not have to worry about keeping the compiled site files in source control or uploading them via FTP.
There are a lot of advantages to moving away from content management systems and toward static sites where possible. Increased site performance is the primary one (content management systems usually involve reading from a database, whereas static sites are simply files that can be quickly served from webservers like nginx that have been heavily optimized for that task). It’s also nice to keep content under version control rather than trying to sync databases across different environments.
(Sidenote: Among Jekyll’s many features, one of the most convenient is its native support for Sass. Sass makes writing CSS painless and fun, and the fact that Jekyll will compile the Sass sources automatically is a big plus.)
BrowserSync
While Jekyll by default has a built-in server enabled for testing as you develop, BrowserSync has some incredible features for developing for the modern web:
- Live reloading when sources change
- Synced page viewing and scrolling across multiple devices or browsers simultaneously
- Great debugging features
- Automatically go to local site in new Chrome tab on launch
So, while Jekyll watches my source files for changes and generates the site automatically, BrowserSync watches Jekyll’s output directory and pushes changes to the browser automatically. It makes for a great development workflow!
tmux
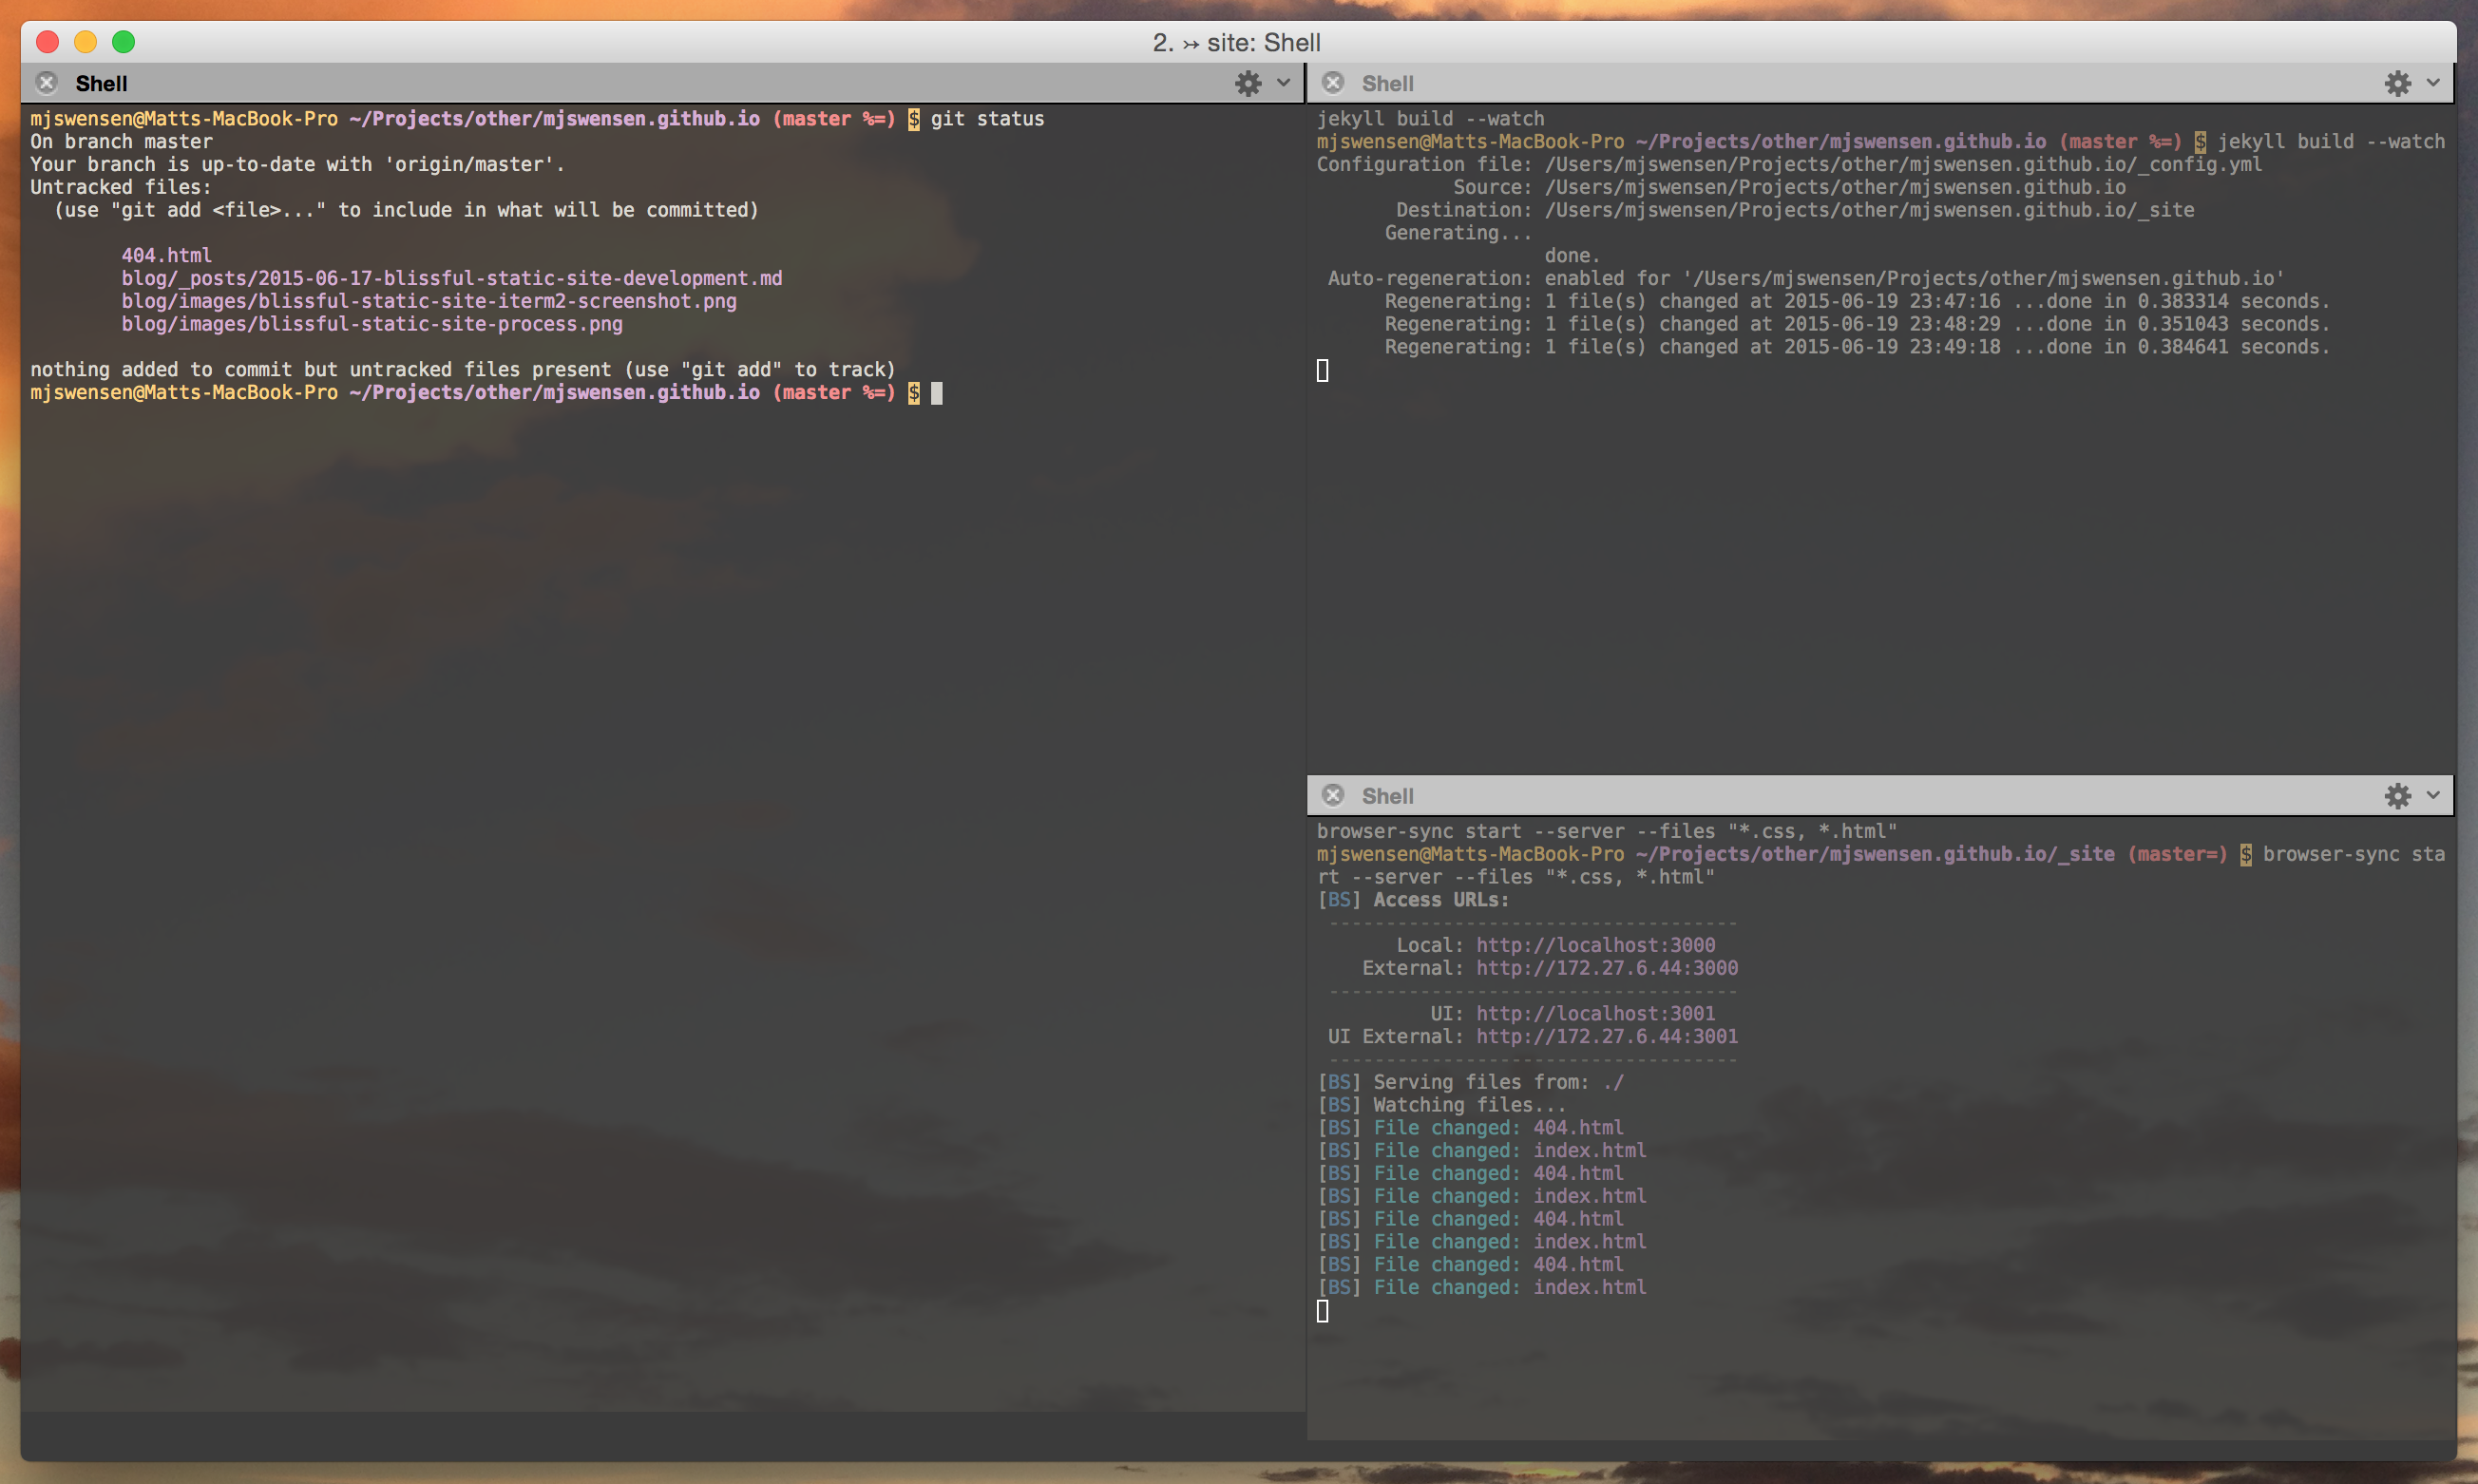
While starting Jekyll and BrowserSync is pretty simple via the command line, it is the same two commands and requires two terminal windows each time I want to write a new blog post or develop the site. This is where tmux comes in. tmux is a terminal multiplexer, which means that it allows for text-based windows and split panes within a single terminal window, among many other fantastic features.
The best part about tmux is that it is easily scriptable. So for developing this site, I’ve written a Bash script that sets up my tmux session, configures the windows and panes as I like them, and starts Jekyll and BrowserSync in separate panes. The script is pretty simple:
#!/bin/bash

SESSION="mjswensen"
PROJECT_PATH="/Users/mjswensen/Projects/other/mjswensen.github.io"
OUTPUT_PATH="$PROJECT_PATH/_site"

tmux new-session -d -s $SESSION -n "site" -c $PROJECT_PATH

tmux split-window -h -t $SESSION:0 -c $PROJECT_PATH
tmux split-window -v -t $SESSION:0.1 -c $OUTPUT_PATH

tmux send-keys -t $SESSION:0.0 "git status" enter
tmux send-keys -t $SESSION:0.1 "jekyll build --watch" enter
tmux send-keys -t $SESSION:0.2 "browser-sync start --server --files \"*.css, *.html\"" enter

tmux select-pane -t $SESSION:0.0

tmux -CC attach-session -t $SESSION
iTerm2
Finally, I use iTerm2 in place of the standard Terminal.app for Mac. iTerm2 has some amazing features and is a popular choice for terminal emulation among Mac users. The reason I like iTerm2 so much is for its deep tmux integrations. While tmux brings some great features to the terminal, certain common tasks—like switching between windows or copying text, or scrolling—involve cumbersome keyboard commands and workarounds. iTerm2, when attached to a tmux session with the special -CC command-line flag (as seen in the script above), converts tmux windows and panes to native iTerm2 tabs and panes. It sounds simple, but it really makes all the difference. It really is a great solution for tmux fans.
In the end, this is what the iTerm2 window looks like:
Thanks for reading!